Background
When Animal Crossing: New Horizons came out in March 2020 it gave the world an escape when it needed it most. Despite being stuck at home, you could hang out with friends virtually and pass the days building out your dream island.
You fund your in-game adventures (and pay off your in-game mortgage) with a currency called Bells. Typically, you earn these in a slow grind of trades like fishing and mining. Fans built marketplaces like Nookazon and a global economy emerged.
There’s also the “Stalk Market” – the game’s simplified stock market. Players can buy Turnips on Sunday and try to sell them for a higher price later in the week. Turnip prices vary day-by-day, island-by-island – the highest price (and best profit) might be on your friend’s island. At the game’s peak, players would wait in virtual lines for hours to visit an island with the best rates.
What if there was a way to get rich without hours of grinding or price-hunting? Here’s how I “beat the Stalk market” – and you can too!
Gameplan
Objective: maximize turnip profits. This starts with buying as many turnips as we can afford on Sunday – easy! You could advance the system clock day-by-day until you find a good price to sell for… but there’s two roadblocks:
- Turnips expire after 7 days (on your island)
- Prices are random – there’s no guarantee of profit
Workaround: borrow a friend’s switch and time-travel freely on a temporary island. But we can still do better – it took 167 days to find a 400+ turnip price. With each check taking ~3 minutes that’s over 8 hours spent in a painful cycle of change the date, restart the game…
What if we could automate that?
Hardware
We need to automate the Switch controller itself. Good news: we’re not starting from scratch! A GitHub project called progmem/Switch-Fightstick has laid the groundwork. It uses a library called LUFA (Lightweight USB Framework for AVRs) to turn an AVR-based board (ex. Arduino or Teensy) into a “pretend” Switch controller. Even better: forks like ebith/Switch-Fightstick build on this to provide Python API which sends commands to the “controller” over serial.
For my setup, I used an Arduino Uno R3 I had on hand. You could also use an Arduino Micro (smaller) or a Teensy 2.0++ – but not a Teensy 3 or 4 (they’re not AVR-based and won’t work here).
The USB port you’d normally use to program the Arduino via your laptop? Now it’s plugged directly into the Switch – so we’ll need another way for the laptop and “controller” to communicate. We can use a USB-to-serial adapter like the FT232RL to establish that connection. The data flow looks like this:
You’ll need some jumper cables to connect FT232RL to the Arduino. Connect the wires as follows (from FT232RL to Arduino):
- VCC -> 5V
- GND -> GND
- RX -> RX
- TX -> TX
Finally, you’ll need a USB-B to USB-C cable (or USB-B to USB-A with USB-C adapter) to connect the Arduino to the Switch.
Not all USB-C cables seem to work – but I’ve found a simple way to check. Connect the Arduino to the Switch first (don’t connect the USB-to-serial adapter yet). If the LEDs on your Arduino light up, it’s powered, and it should work.
Always connect the Arduino to the Switch before connecting the laptop to the USB-to-serial adapter. Connecting in the reverse order seems to mess up the initialization process and the controller won’t register.
Note: This site earns commission from purchases made with the links above.
Software
Next, you’ll need to update your board’s firmware. Follow the steps in shinyquagsire23/Switch-Fightstick but beware a few things:
- Update the MCU field in the Makefile to match your chosen board. For example, use
atmega16u2for an Uno orat90usb1286for a Teensy 2.0++. - Normally, you program the Arduino via USB. In this project, we’re repurposing that USB controller to appear as a Switch controller. To make this switch, you’ll need to put the Arduino into DFU mode through a special reset procedure. If you want to return to using the USB for programming later, you’ll need to restore the original firmware.
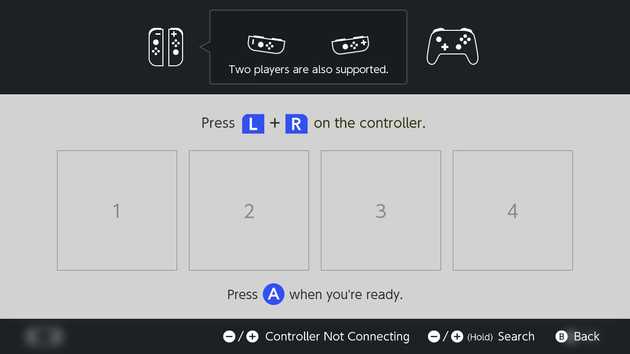
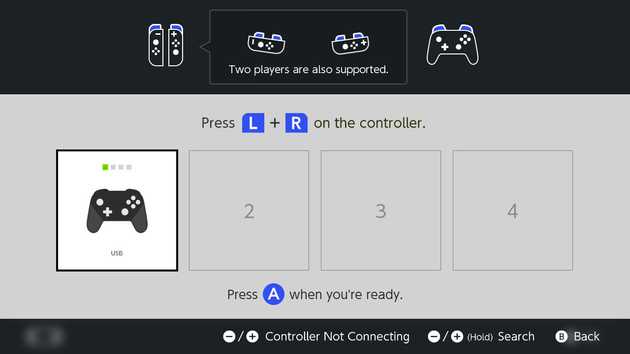
- Once you’ve connected the controller via USB, you’ll need to press any button for it to show up in your console’s menu. Don’t worry if it’s not instantly recognized – I had the same issue. For the curious, I’ve included an appendix on how I figured this out (with wire strippers & a logic analyzer!)
You should now have an Arduino, reprogrammed to appear as a Switch controller, and a serial connection to drive it via a Python script.
Price Hunting Script
For our turnip hunting adventure, the process of advancing the day and checking the price is as follows:
Hometo exit GameX,Ato close active game & confirmDown,Rightx4,Ato enter System SettingsDownx13,Right,Downx4,Ato enter Date and Time menuDownx2,Ato enter submenuUp/DownthenRightto change month, day, hour, minute, etc. based on loop valuesRightx10,A,Hometo save & exit Date and Time menuAx2, 20 second wait,A, 10 second wait to start game- Directional +
Bto run to store (depends on your island’s geography) andAto enter - Brief
Up,Ato begin store clerk chat Screenshotof the turnip price for auditing purposes
This process repeats until a desirable turnip price is found.
Automating navigation
When you first start the game, you’ll find yourself outside your house, needing to get to the nearby store. Instead of relying on precise joystick movements and timing, I took a different route. I placed objects in the outdoor world (ex. cardboard boxes) to act as walls and then used basic UP/DOWN/LEFT/RIGHT commands to ram the character through the maze. This minimized the odds of the character walking “off track” and kept things simple.
Future Improvements & Opportunities
OCR
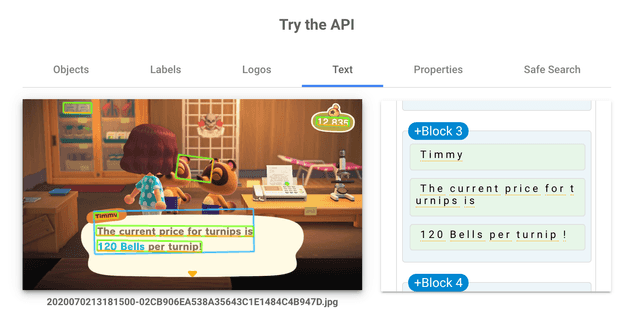
When I’ve shared this project, many jump to the conclusion that I used OCR (Optical Character Recognition) to auto-detect turnip prices. Sure, something like Tesseract or Google Cloud Vision API could easily read the prices:
However, that would also mean wrestling with getting the game’s video feed into the script – either through a precarious webcam setup aimed at the Switch or some HDMI capture card.
My approach was simpler: the script would pause, play a bell, and wait for me to decide whether the price was worth jumping on. No OCR, no capture cards – just a human-in-the-loop.
Fail Early Using Turnip Prophet
Prices aren’t completely random – fans have reverse engineered some general patterns behind turnip pricing. The Turnip Prophet tool predicts future turnip prices based on the week’s opening prices. Using this, we could bail and immediately jump to next Sunday if we know there’s no possibility of a higher price later in the week.
Final Product
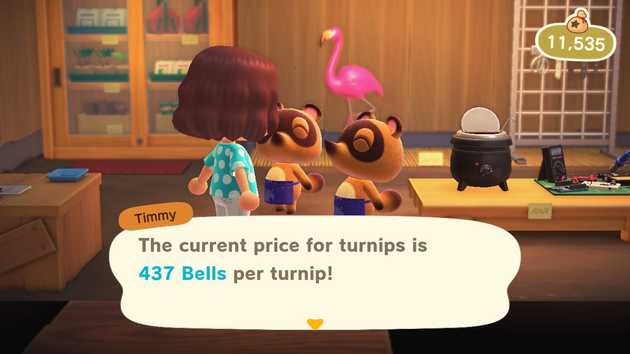
After 167 cycles and countless button presses, the payoff was huge: Nook’s Cranny offered 437 Bells for each turnip – a staggering four-fold increase on my initial investment!
I ferried turnips from my main island to this temporary goldmine and racked up a few million Bells in around 30 minutes. My friends and I upgraded to island mansions and decked them out with the best decor Bells can buy!
Whether you’re an Animal Crossing aficionado, a hardware enthusiast, or just someone looking for a fun project – I hope this inspired you. Happy hacking!
Appendix: why isn’t the controller connecting?
I followed all the steps: set up the toolchain, flashed the Arduino, plugged it into the Switch, and… nothing. No new controllers listed. Reflashing didn’t help either. Huh?
Does it work with the laptop?
Next, I tried plugging the Arduino’s USB directly into my laptop:
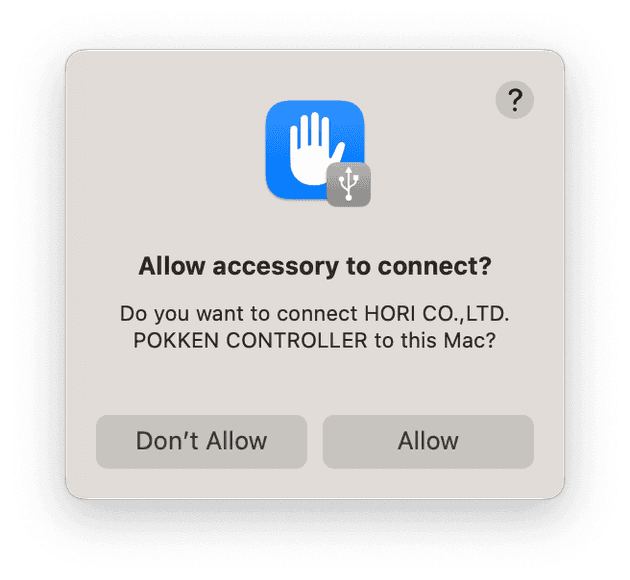
A popup appeared asking if I wanted to allow a game controller to connect. So the firmware was working – just not with the Switch?
Is it the cable?
I tried several different cables, as I’d read on GBATemp Forums it might make a difference. Still no luck.
What else could it be?
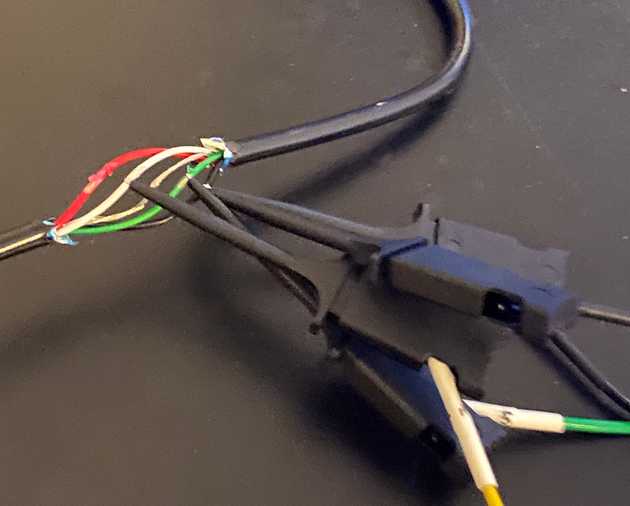
At this point, I went full-on detective mode. I stripped the USB cable’s internal wires, hooked up a logic analyzer, and started capturing data. This is as hands-on as it gets: reading raw voltages to decode USB packets.
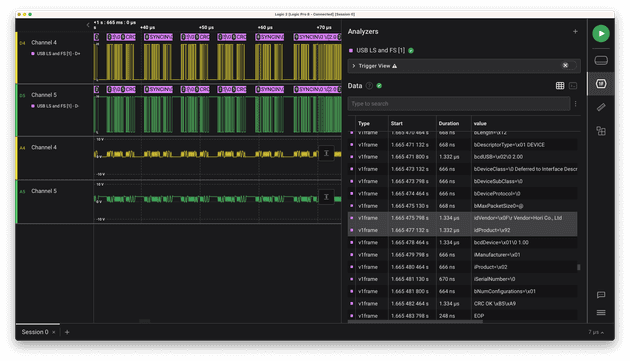
I initiated the capture, connected the “game controller” USB to the Switch, and closely observed the USB negotiation:
Indeed, seeing Vendor=Hori Co., Ltd idProduct=\x92 on the wire confirms it was also connecting correctly with the Switch. I tested a real wired controller and verified a similar handshake.
I fiddled around with the real controller out of confusion – and noticed it only appeared on the console’s menu after I pressed a button. This was a subtle, but crucial, detail. I sent my first Button A command to the fake controller and… tada! It also appeared on the menu.
Getting down to the wire (literally) might have been a bit overkill, but a fun detour!


